Here are a few steps to help you get your training system up and running:
- Remove your training system from the shipping box.
- Make sure that you DO NOT THROW AWAY any needed components.
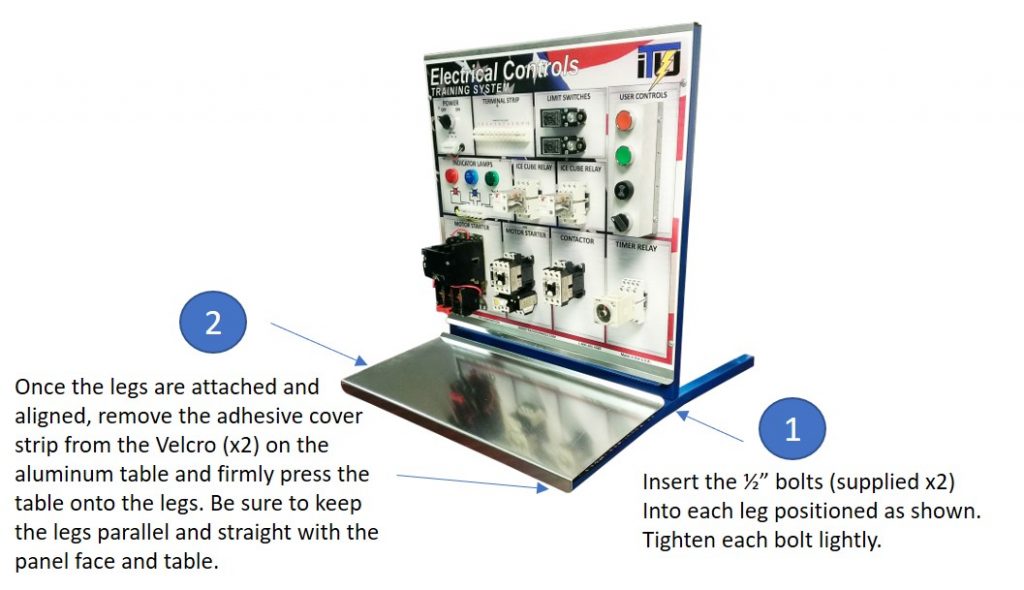
- place your tabletop training panel laying on its back with the bottom edge of the panel near the edge of your table.
- Place each leg on each side of the panel top aligning the 1/2″ bolt hole as shown below. Insert a bolt into the leg hole and thread it into the panel face frame. Tighten the bolt snugly. Do not over tighten.
- Mount the Aluminum work table surface to the legs. Peel off the adhesive cover of the Velcro on each side of the table, then place it firmly onto the legs. Make sure that you align the table and legs squarely with the panel face.
- Connect your panel to a standard 120 volt outlet to supply power to the unit.
- The panel, as you know, is designed to be wired by the student for each lab. The unit will have not operational features until the student connects the wires and constructs one of the labs in the hands-on portion of the student workbook.

